Showing posts with label hard landscaping. Show all posts

Thursday, 30 June 2022

A New Patio

The garden has seen a major change over the past 2 months, namely, the patio has been pulled apart and rebuilt. The time had come to finally do away with the old pressed concrete that was poured over 30 years ago. It has served us well but we both had a desire to get rid of the tired looking patio. The new design was not a difficult choice, it had to fit with the style of the rest of the garden, so a rustic "naturalistic" feel was essential. It was also a critical choice as this is the part of the garden, being immediately outside the back door, that is the most well used.

The choice of local Yorkstone paving was made to match the sun terrace and other drystone walling elsewhere in the garden. The source was the exact, same local quarry, so a beautiful coloured stone was guaranteed. It was never really an option to go for Indian sandstone or something else with a lot of transportation involved, the ethos of minimizing our carbon footprint has become more important to us both. The use of clinically precise porcelain tiles might have been the fashionable and contemporary choice but this would have been the anti thesis of the ambiance we have tried to encourage. The riven finish was also selected to complete the look.

Sadly, the living wall has had to be cut back. However, the builders have done an excellent job in minimizing the damage. It helped that one of the team was a keen gardener himself. All the plants have been saved and the vegetation is set to grow back again, hopefully for a complete rejuvenation.


The old wall has been dismantled and it is easy to see how much of the garden is simply solid rock, with a very shallow layer of soil.
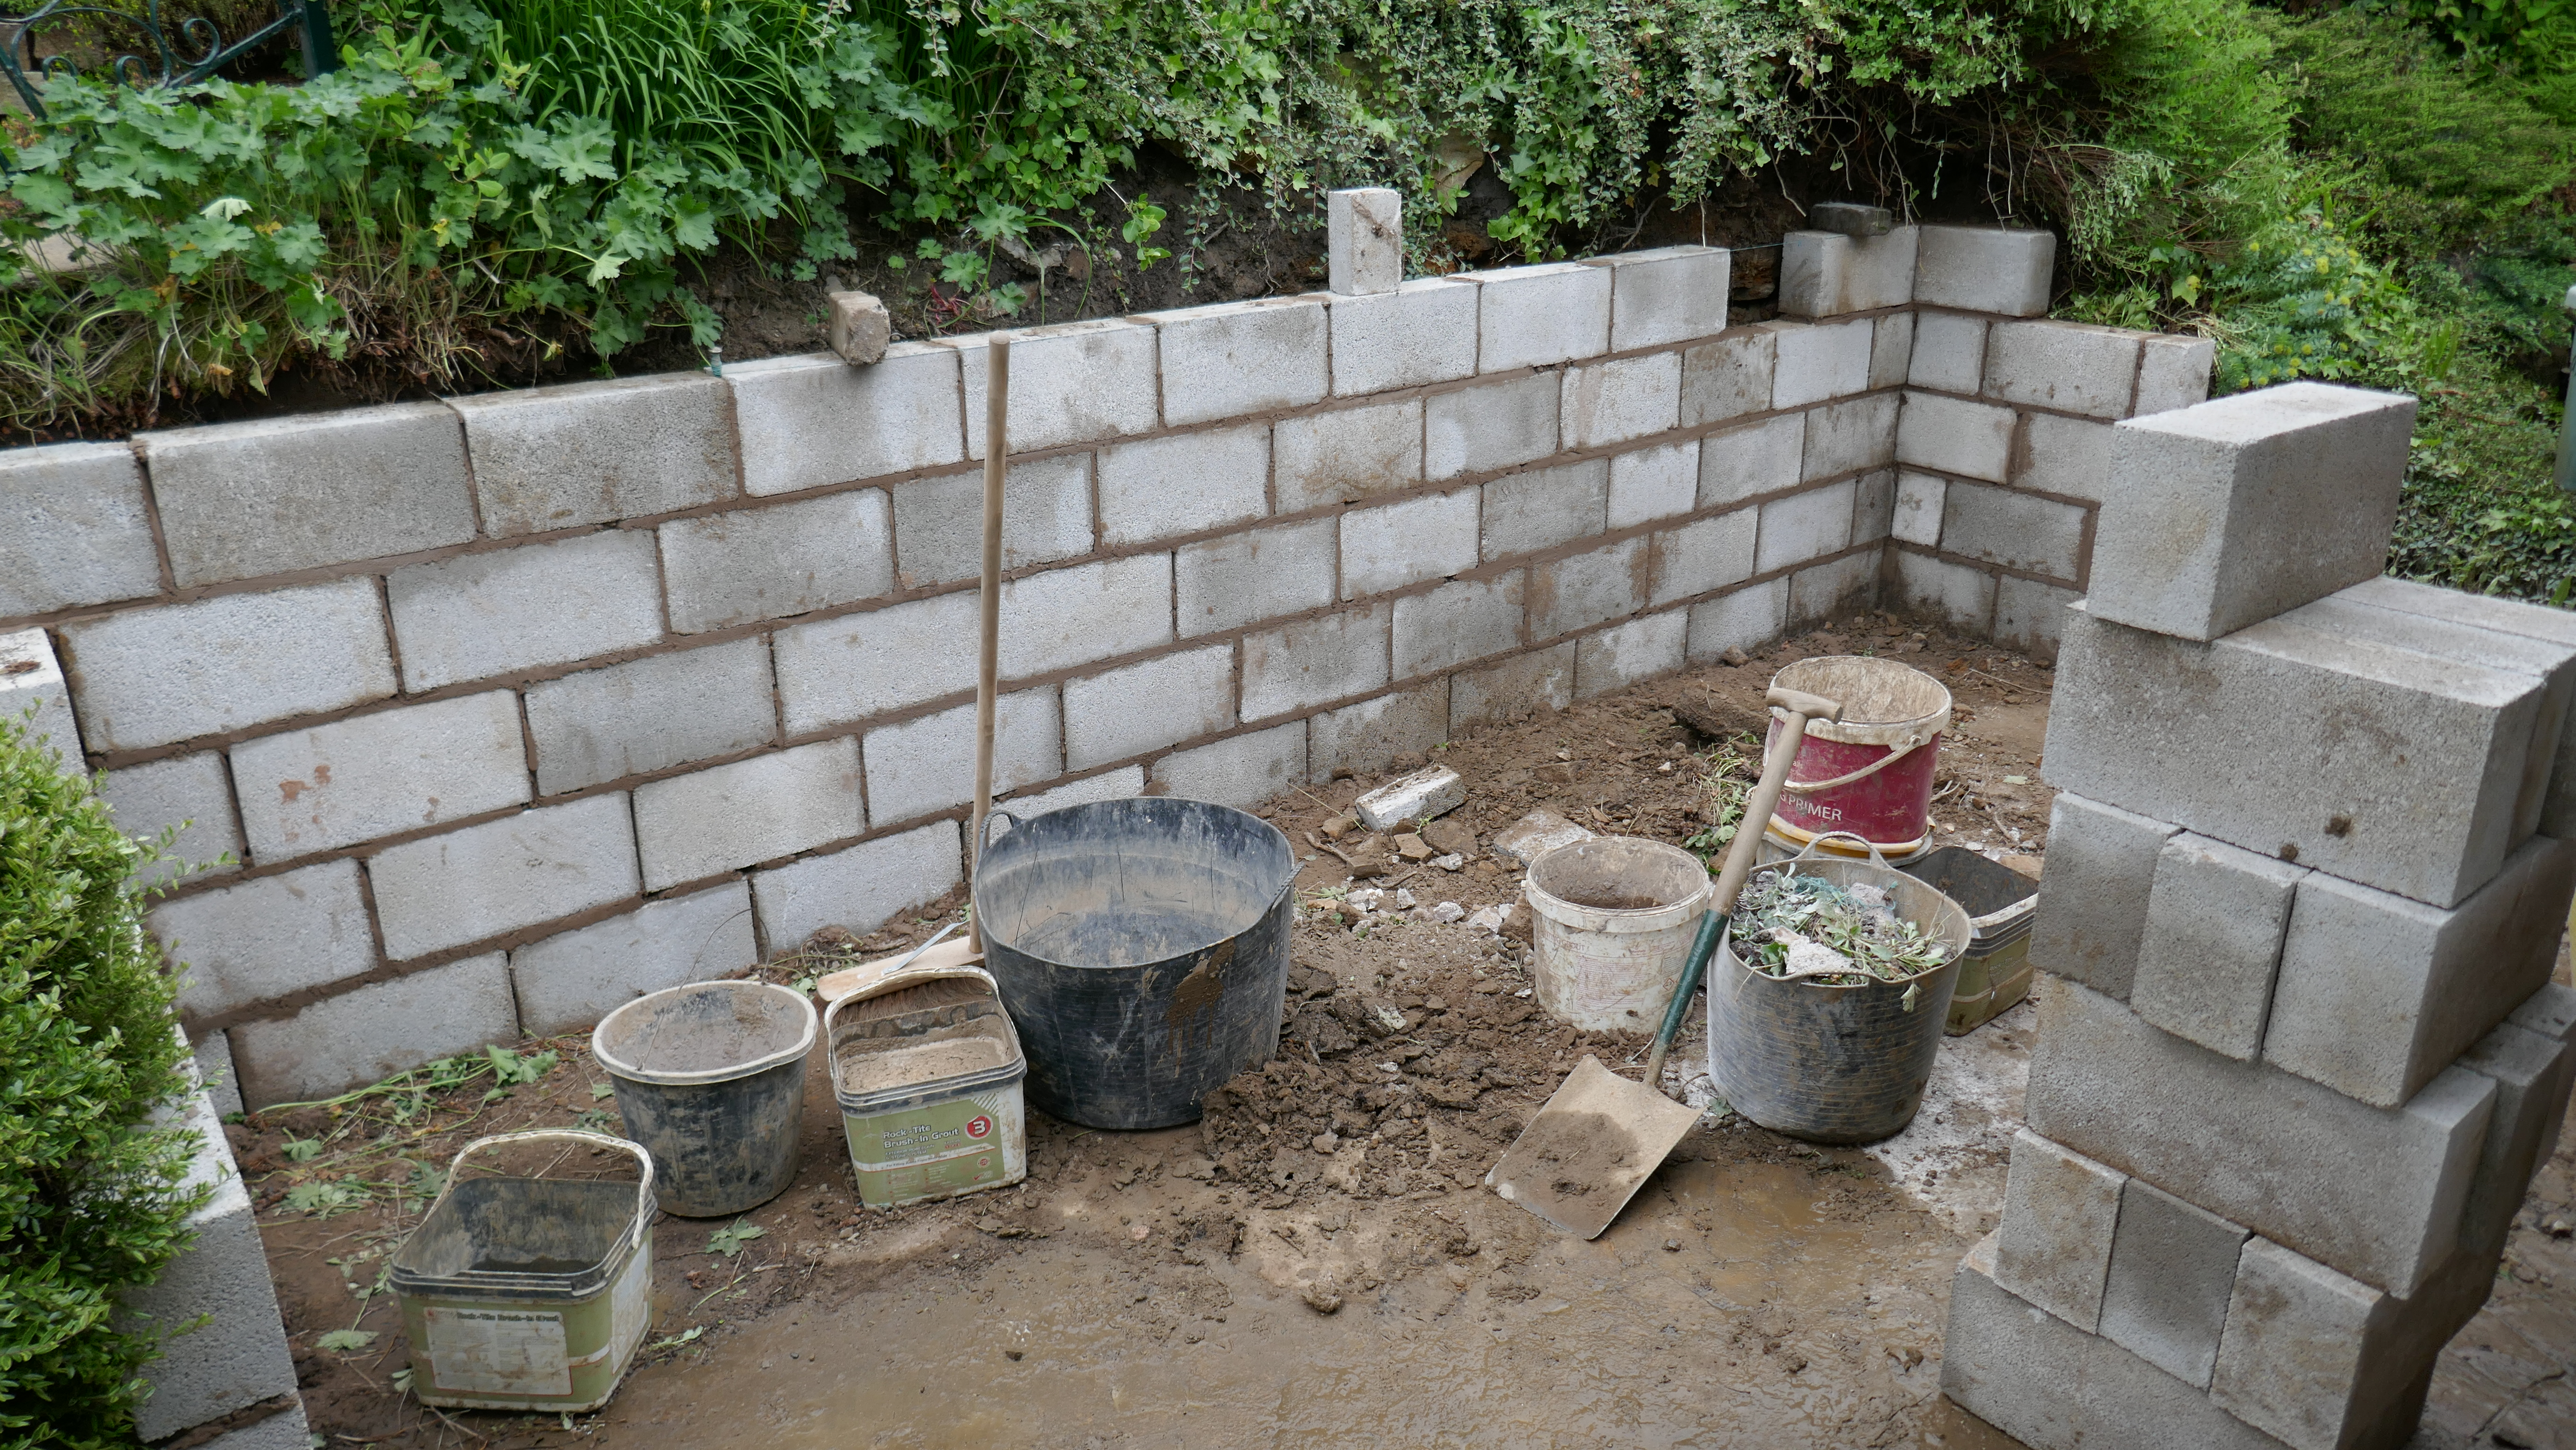

Solid concrete blocks are laid for integral strength in the new retaining wall.


Newly quarried, riven faced Yorkstone paving is laid with precision.


The builders have finished and now the start of my contribution, the first pass of the rendering.


Rendering finished, perhaps not perfect, but with luck the living wall will grow back and cover the majority of the retaining wall in 18 months time (and disguise my best efforts). At least, that is the plan, as the Mediterranean feel of the freshly rendered wall is not really in keeping with the vibe of the rest the garden. But the rendered finished had the critical advantage of preserving as much of the newly created extra space as is possible. Updates will follow.

Meanwhile it is now time to get back to the rest of the garden, which has had to take a back seat for weeks now. Blogging can also be resumed again!

Friday, 30 October 2020

Gardeners World Viewer Contribution


Earlier this year I responded to the Gardner's World request for some viewers videos. During the first lockdown making TV programmes was quite a challenge, hence their appeal for material to help fill their show with segments other than repeats. Sadly, mine was not selected for screening, I am guessing the ambient noise from the virtually ever present breeze in the Pennine garden might have been the reason. Alternatively,  it could have rejected on the basis that my less than photogenic film star good looks were just not quite right aside:  but surely Mili would have compensated with her last scene appearance! 

Anyway I hope you enjoyed my little attempt, or at least had a chuckle at my screen presence!

Tuesday, 20 February 2018

Design for Winter

Although much of the design of our garden is ad hoc evolution I have been quite conscious for the past few years about gradually redesigning of some of the rooms. It is a little luxury that retired gardeners can afford. The black and white terrace, for instance, is one of the few areas clearly visible from the house. As it was constructed less 18 months ago it is still quite some way off maturity. But I have been quite conscious about the need for some winter interest and structure in this part of the garden, exactly because it is visible from the kitchen. In the morning, when it is light, the planting of the terrace and the evergreen nature of the patio living wall are a welcome splash of colour, all be it mostly green.


The heathers, the hebe (midnight sun), the mouse eared chick weed, the sarcococca humilis, the viburnum, the black grasses and taller black phormium, all give the area a certain interest on a grey February morning. Even the buddleia in the bed above adds some structure, it has been deliberately left largely unpruned. The "butterfly bush" still has some leaf and greenery visible but it will need to be cut back down in the next week or so as the flowers are always on this years new growth.

The first signs of spring will also be evident by looking out of the window onto this space. The spring bulbs are just beginning to show in the raised beds and pots.

This is in direct contrast to other beds in the garden which still look somewhat bleak and rather bare at this time of the year. But they will also need a little attention, weeding and mulching. Fortunately, I can avoid stepping all over the beds (and avoid compacting the heavy soil) by carefully finding a foothold on the retaining stonework.

TIP: avoid standing on the soil in the beds wherever possible and if not use a piece of board laid on the ground to spread your weight.


Thursday, 12 October 2017

Shorter Days and Colder Nights


The cottage beds have now had the last of the potatoes harvested but there is still a little colour left in the flowers.The two cats are enjoying the limelight. Steps are now even closer to completion while posts and bricklaying are now complete. Treads and handrail still tbc. Autumn is very much about tidying up. Most of the lawns have been scarified and forked as deeply as I can. I find the advice about lawns quite contradictory, to brush sand into the holes or not? I think most gardens benefit from a little lawn but my goodness they are certainly the most time consuming part of the garden. My advice is grass is lovely but beware of becoming a slave to the lawn!

Days are noticeably shorter and temperatures are falling. I am awaiting the first frosts so the half hardy plants will be brought under cover. Agapanthus, dahlias and some of the lilies are now in the cold frame. This protection of the more tender plants is something the gardener should not take for granted. Learning what will survive in your garden is often a matter of trial and error, I have found to my cost that even plant labels can be misleading. 


Thursday, 14 September 2017

Garden Steps


The current project is the garden steps, a new handrail will be put up and the entire flight dismantled and rebuilt. But what a surprise the dreadful weather gets in the way again. I must confess to enjoying the hard landscaping but it is frustrating when you are a hostage to the weather. I do not feel confident enough to mix mortar and use concrete when the weather is not just right. Hecate is keeping an eye on proceedings; being somewhat less agile than Mili I am sure she will appreciate it when the steps are usable again.

Sunday, 30 April 2017

Cropped Yorkstone Walling

Oh yes! I really do enjoy hard landscaping. Working with stone is so tactile and the element of permanency means that a job done properly will last decades. I source all my stone whether it be walling material or rockery stone from a local quarry near Bacup. I always buy in 1 tonne loads, that way it is not an overwhelming task to sort and grade, then to carry up to the relevant part of the garden. This lot is for the small retaining walls I am building as part of the new cottage garden beds. This is what a tonne of Yorkstone looks like.

 The first job following delivery is to grade the material. The method that I find the most useful for walling is to sort into pieces of roughly the same thickness. This means the courses can be laid much more efficiently.

The garage is a handy temporary store.

The beauty of the stone is in the texture and colouring.


Cropped walling is the easiest medium to work with as it can be carefully stacked, rather like a grown up lego set to make rustic garden structures. With a little care and using techniques borrowed from dry stone walling, a bespoke stone feature is possible for anyone who is prepared to put in a little sweat and muscle. It is guaranteed to help add clarity to your garden design.

Monday, 17 April 2017

The Floating Trellis

Over the past few weeks I have been adding the final major part of the terrace. Being south facing, this is the part of the garden designed to catch the afternoon sun but is easily accessible from the kitchen. The planting is a black and white theme more of which I will detail in a later post.


Only the finishing touches are now required. But the construction of the floating trellis is detailed below:

The trellis is the newest element of the garden. It will I hope screen the view of the next door neighbours shed. Just as importantly it will offer the framework for a white climbing rose and a white clematis. This will further add a little privacy but more importantly allow the best use of the space with some pretty verticals. These two plants are rooted in planters, a decision I took to try to guarantee decent growing medium. The soil in the nearby beds is very impoverished.


Mili and Hecate both have to be site foremen.


During construction the established plants like the black bamboo needed careful protection. Other plants in the photos are just overwintering with a bit of sunshine and the reflected warmth from the walls of the terrace.


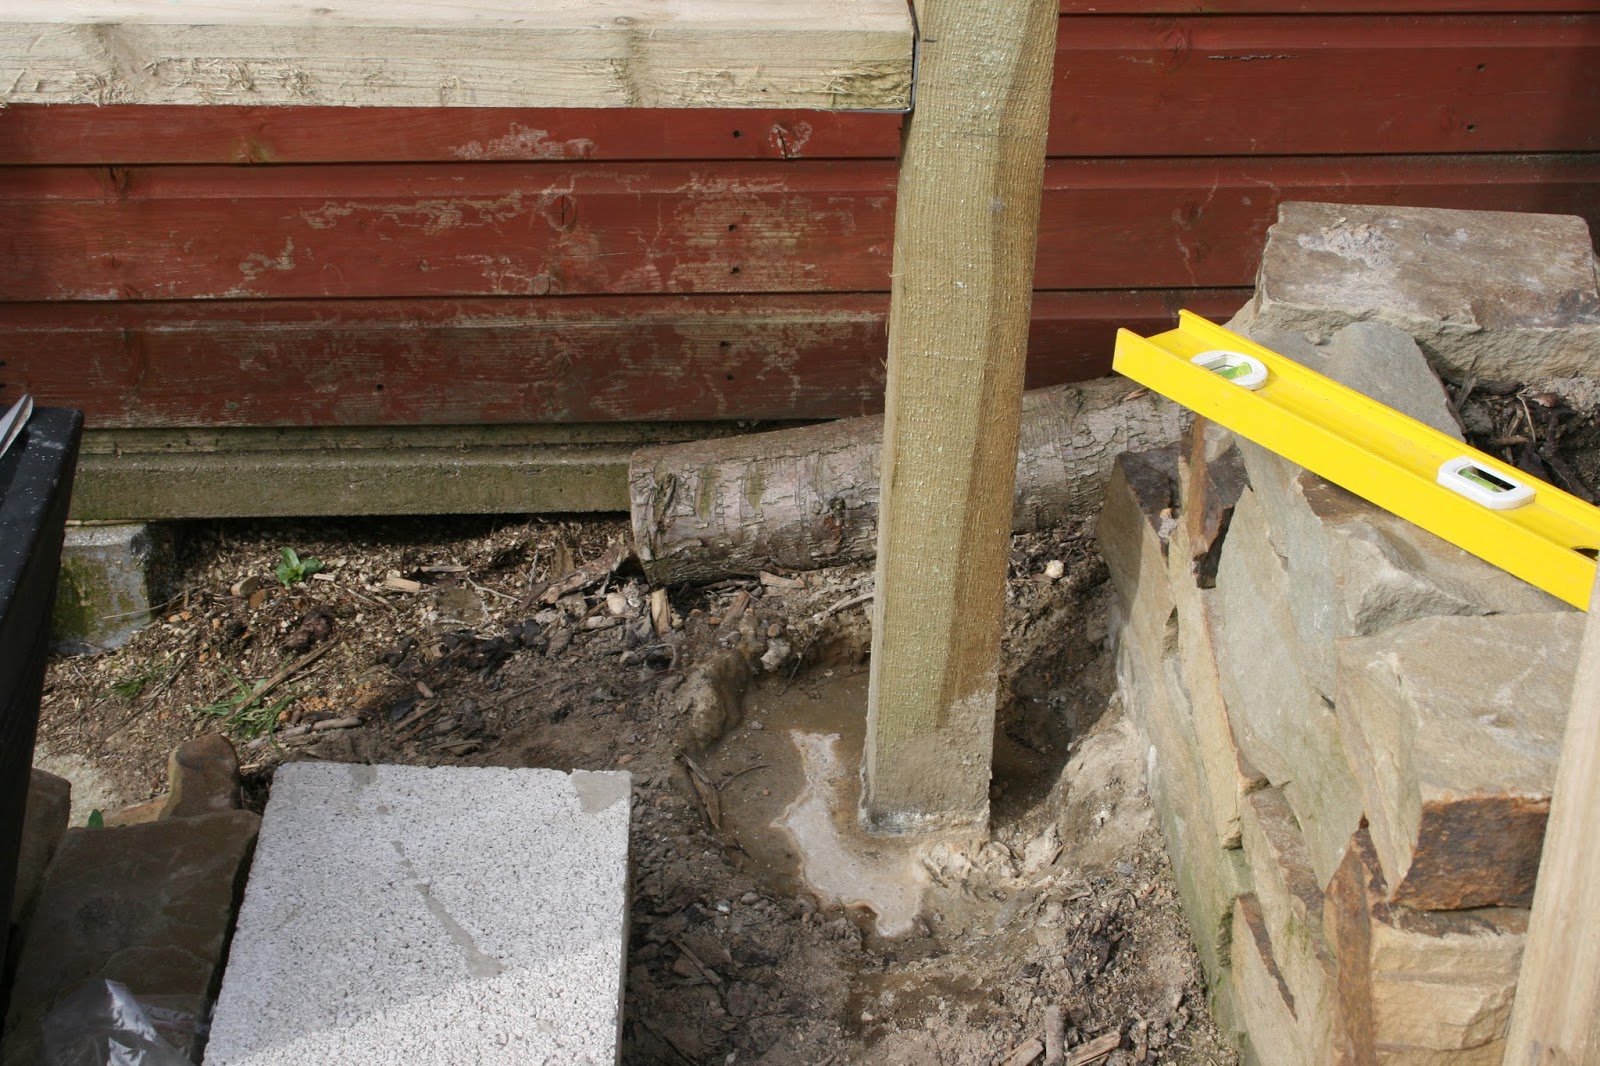
PJ Tip: using post-crete is a simple way of putting up 6 foot posts. Simply dig a hole to a third the depth of your post (at least ideally). Then half fill with water. Place the post in position and add the post-crete mix, to a level above that of the water, while supporting the post for 5-10 minutes until the concrete sets. Really it could not be easier. Just be careful that the post stays level during the brief period the mix needs to harden off. I was able to erect all my posts single handed. It really is that easy.


With the posts in position, cross rails are attached between them. This is then the framework upon which the trellis can be hung. Being an awkward sloping area the timber had to be cut to fit the site. Finally, a cut down piece of trellis fencing panel, bought from a local supplier is then attached. However, be sure to continually check your levels. Being on a slope optical illusion is a hazard. I finished the job with two coats of black wood stain. This has the benefit of protecting the wood and tying the structure to the monochromatic theme of the terrace.